MainWP Pressable extension provides access to the most important Pressable management features. It allows you to quickly create new Pressable sites directly in the extension and at a glance, gives quick insight into the State, Environment and Data Center of the Pressable site and Visitor Analytics, and provides Backup and CDN management.
Installing the extension
Follow these steps to install the Pressable extension.
- Go to your MainWP Dashboard
- Go to the MainWP > Extensions page
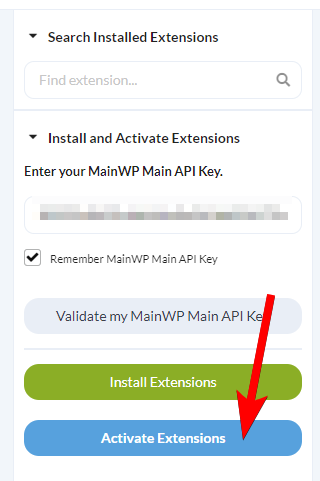
- Click the Install Extensions button
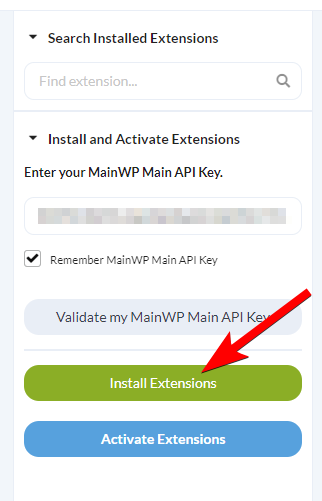
- Locate the Pressable extension and select it
- Click the Install button
- Once the installation process is complete, click the Activate Extensions button.
Connect extension to your Pressable account
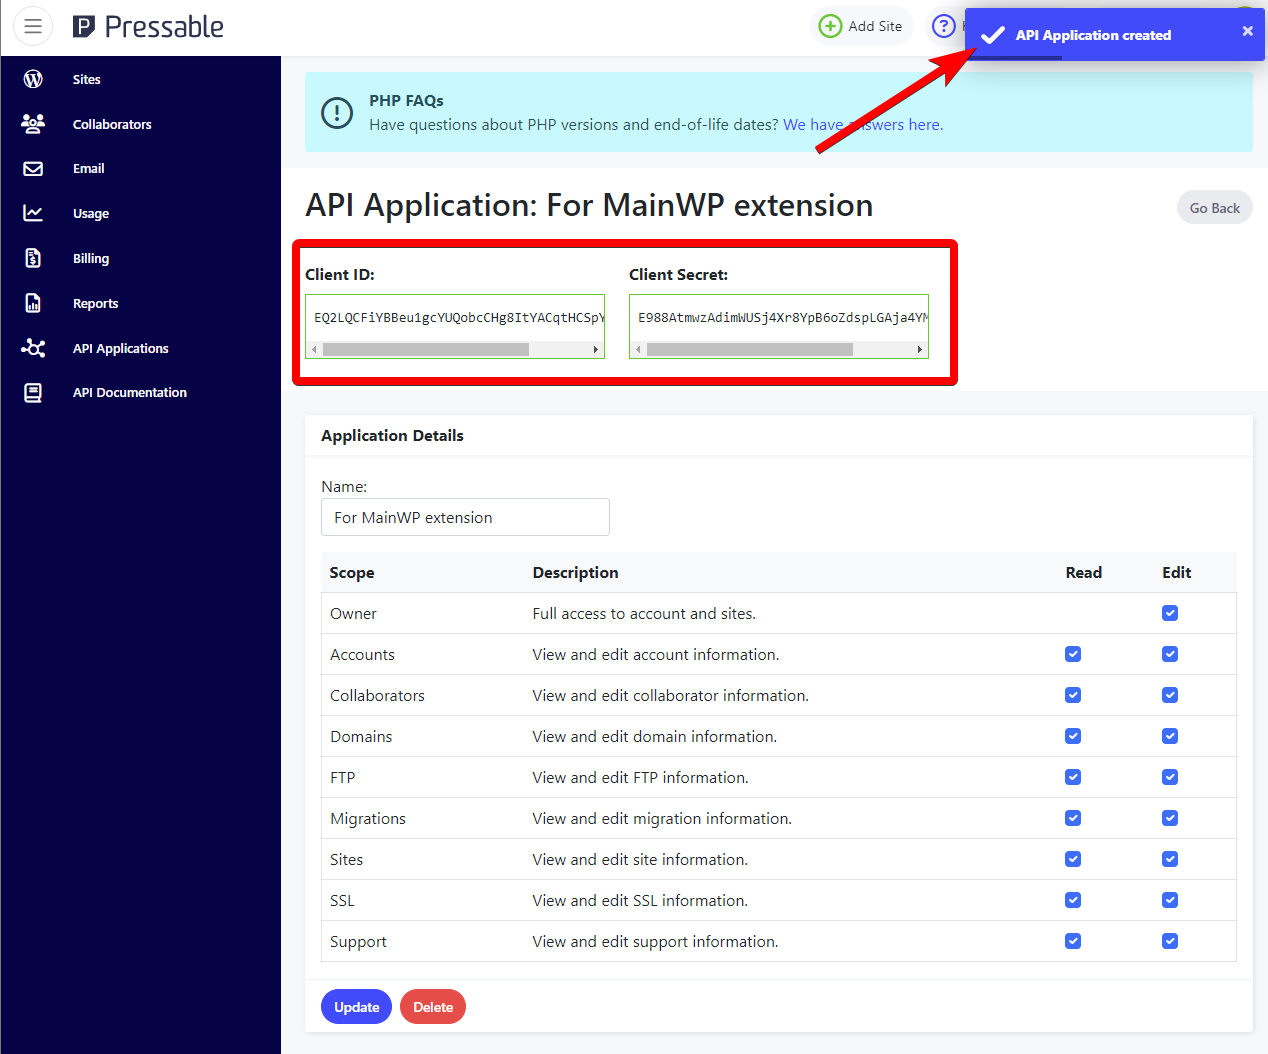
- Navigate to your Pressable account and open the API Application page
- Click the Create New API Application button

- Enter a desired name for the API Application, give the application all permissions, and click the Save button
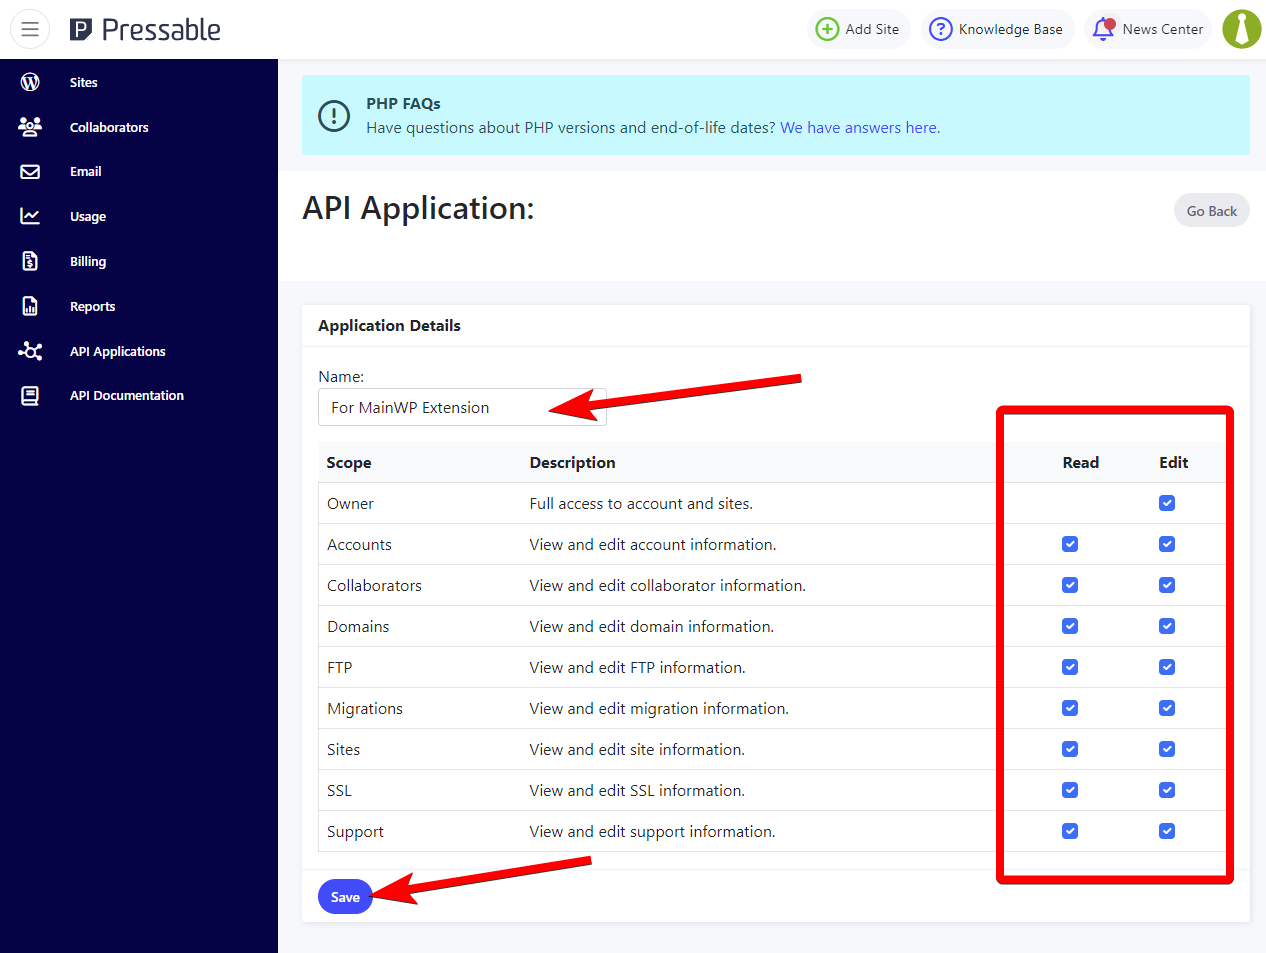
- You will be presented with a Client ID and Client Secret. We will use these to connect the extension, so copy them somewhere or leave this browser tab open
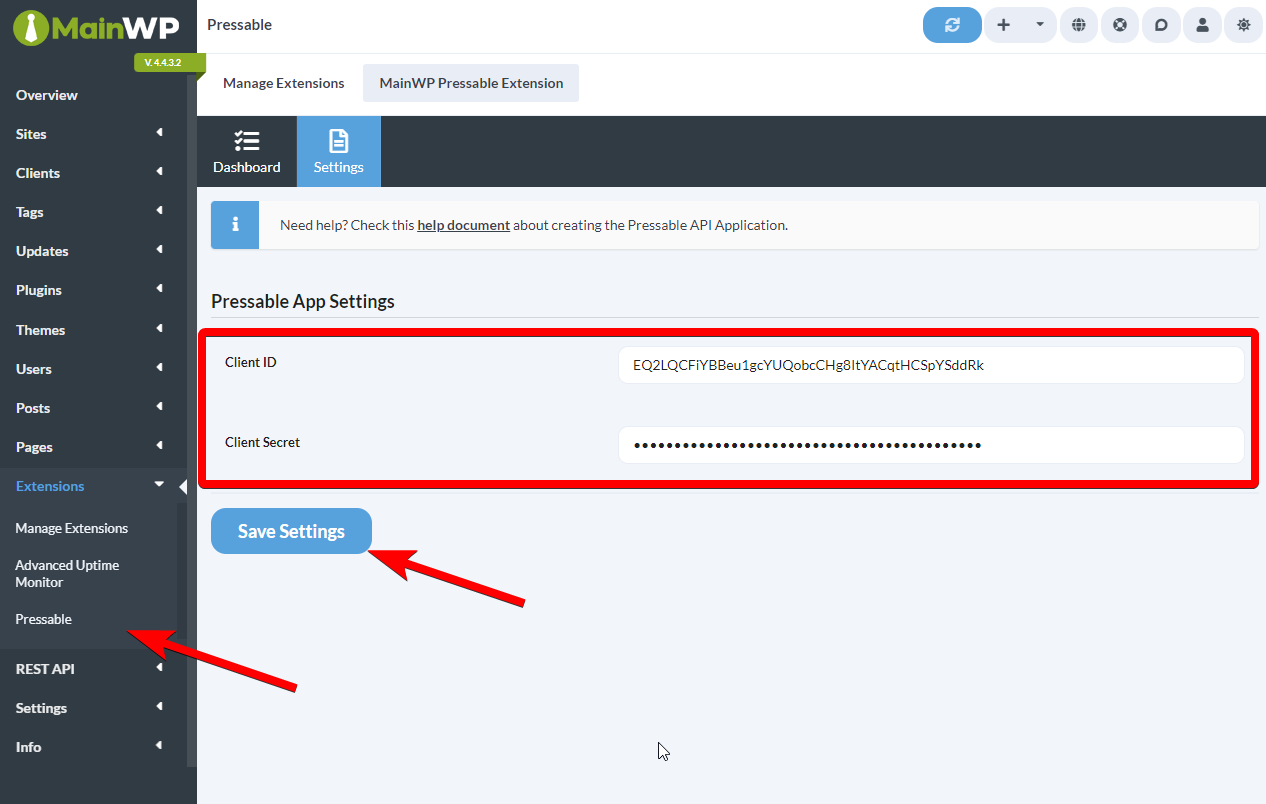
- Now navigate to your MainWP Dashboard > Extensions > Pressable page, and open the Settings tab
- Enter the Client ID and Client Secret and click the Save Settings button
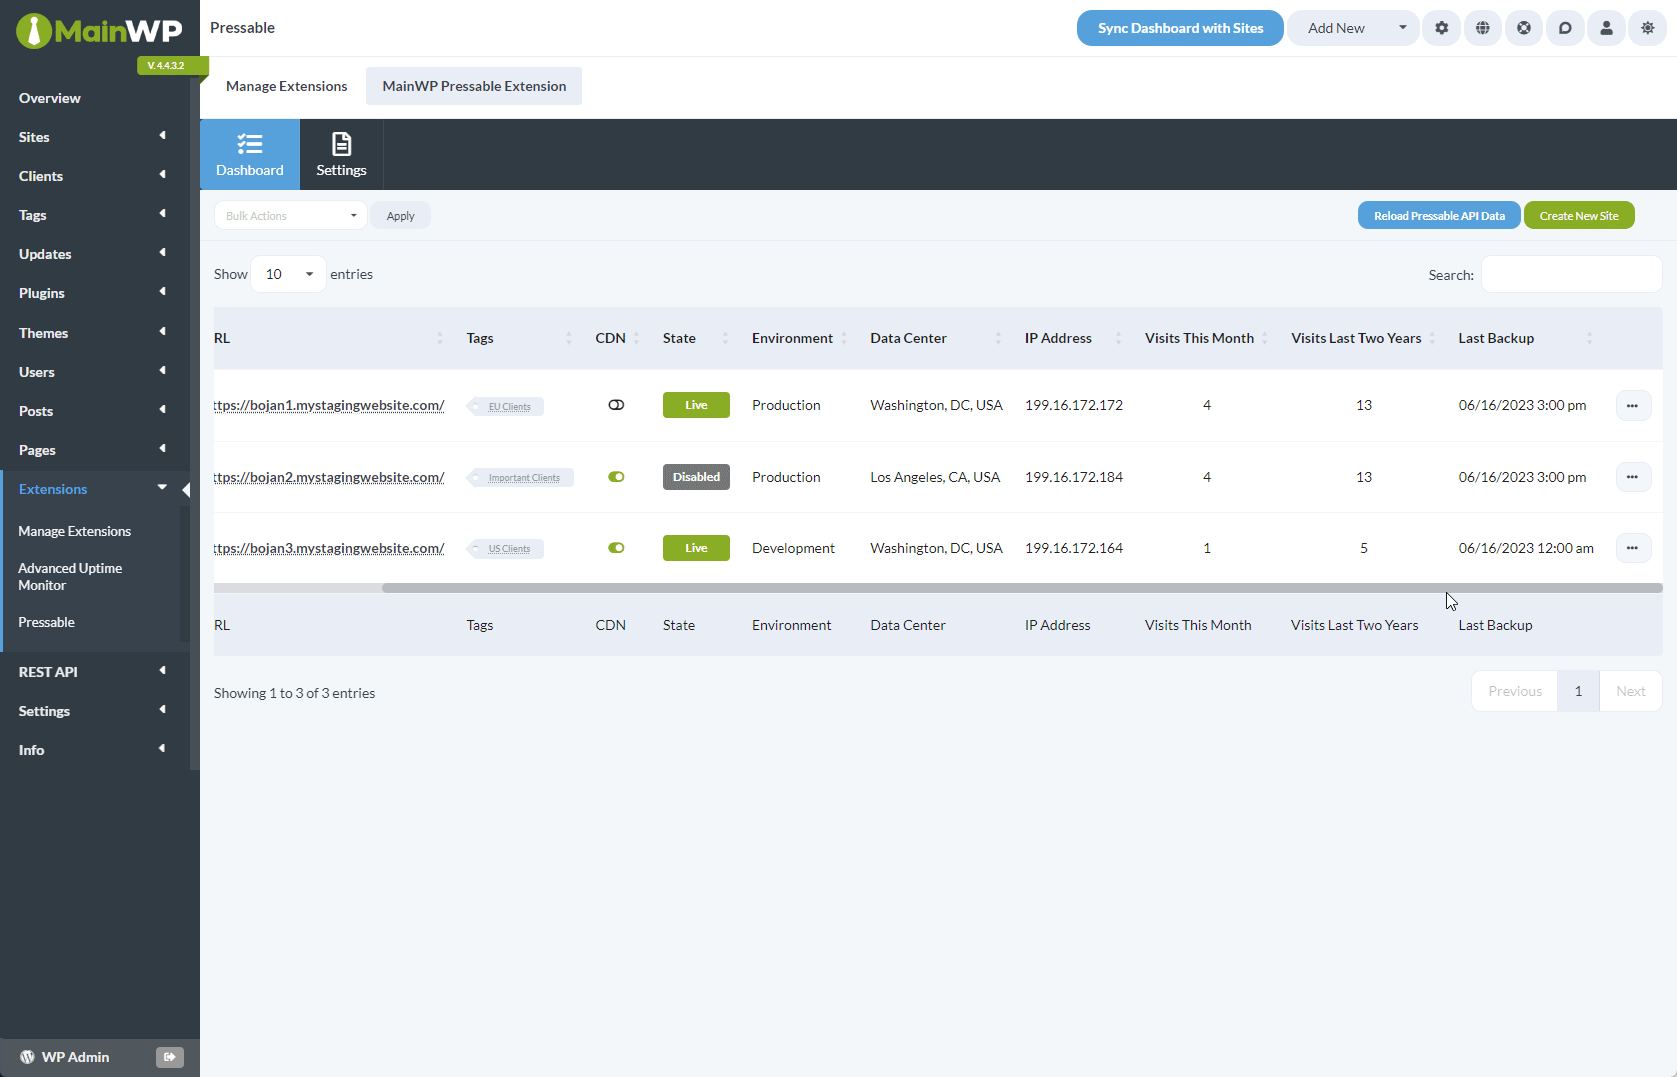
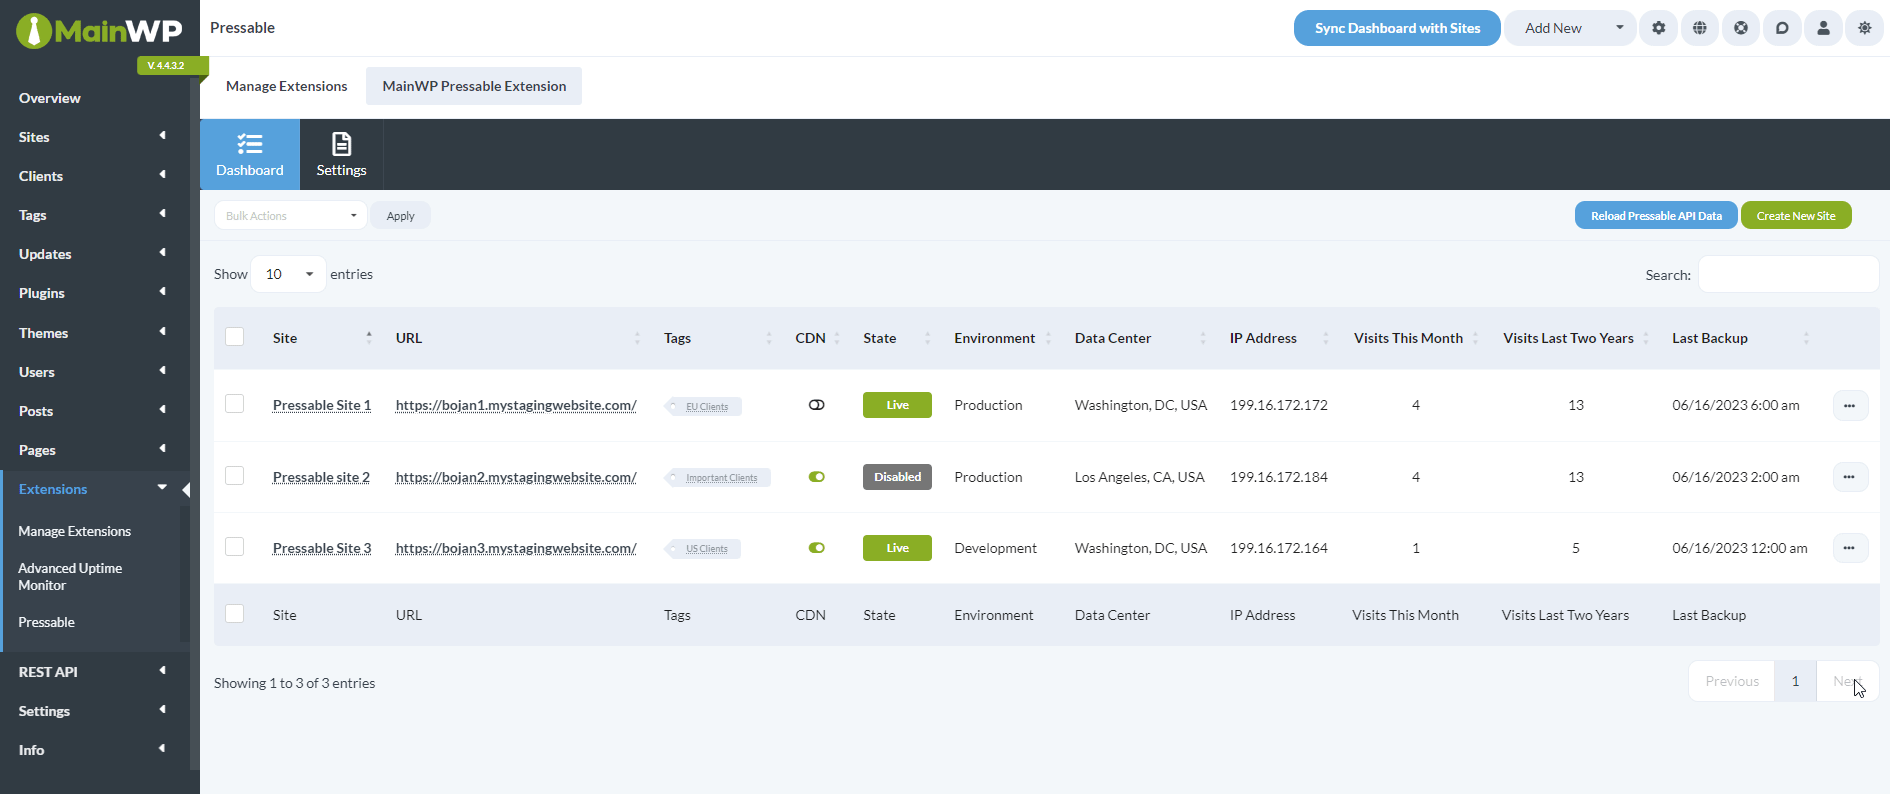
Dashboard page of the extension
This page contains all of the features or shortcuts to the features of the Pressable extension.
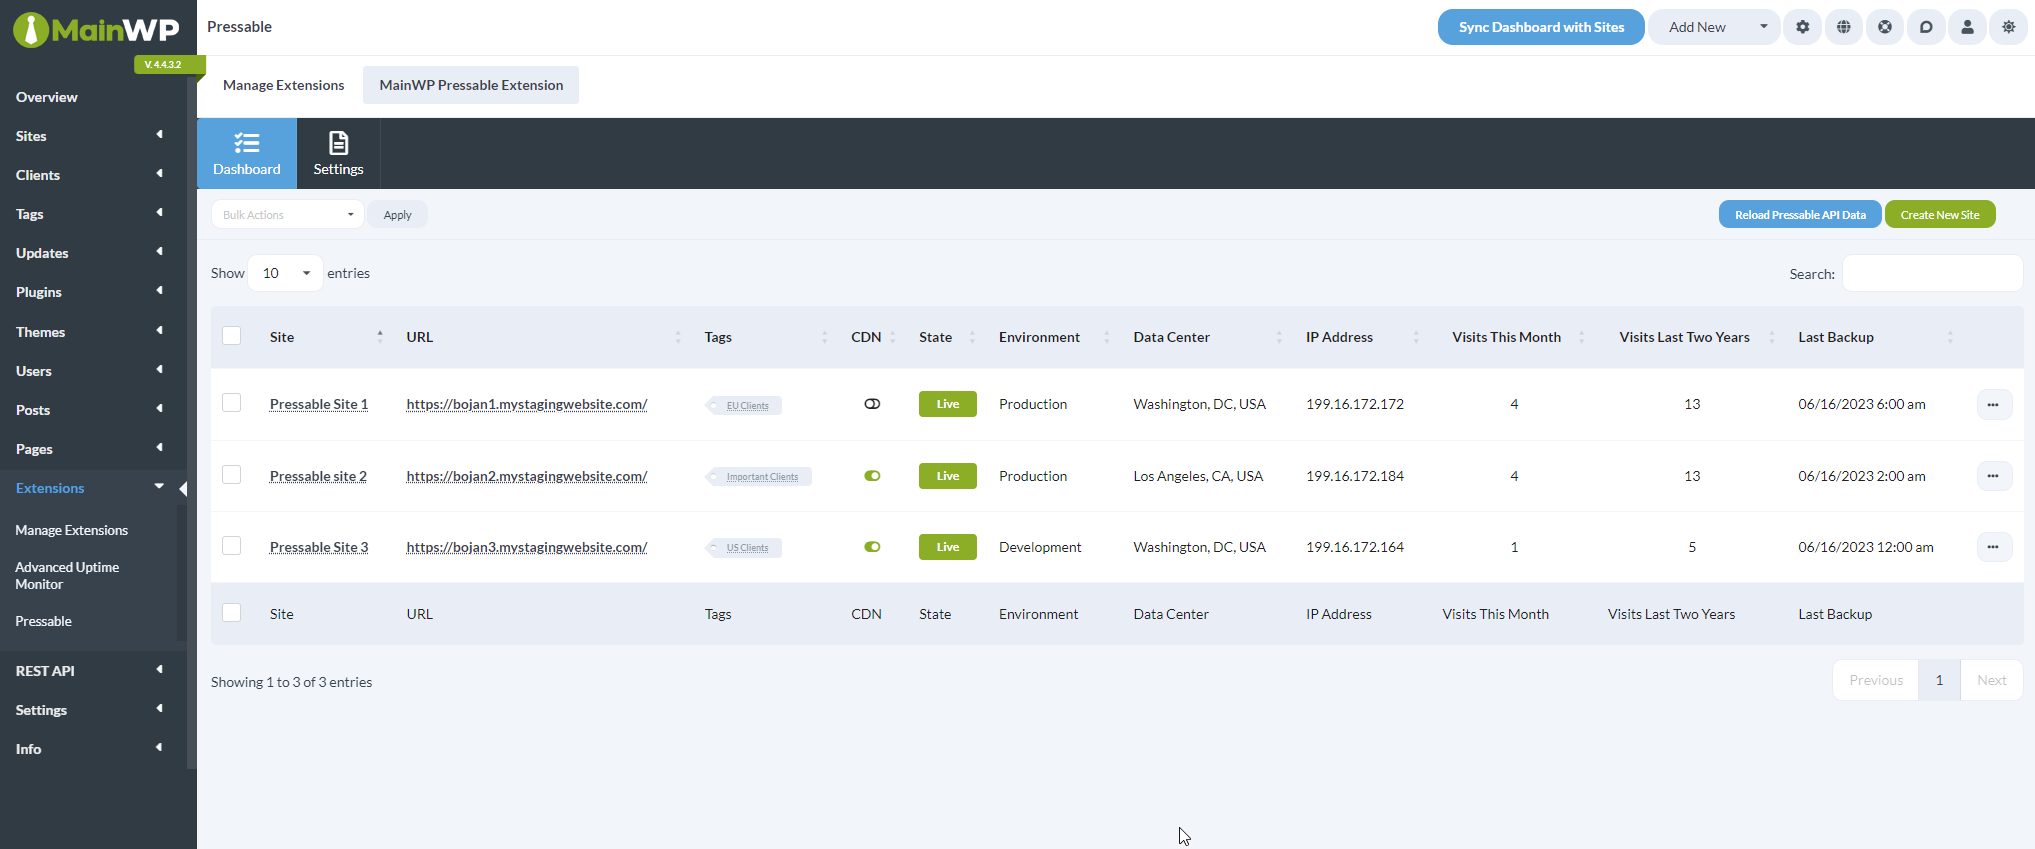
This table will contain all sites from the Pressable account you connected in the extension Settings that are also added to this MainWP Dashboard.
Sites from the Pressable account that are not added to the MainWP Dashboard as child sites will NOT be shown here.
The columns of the table that are specific to the Pressable extension are as follows:
- CDN: Shows a graphical indicator of whether the Pressable CDN is enabled on the child site
- State: Displays the status of the child site, either Live or Disabled
- Environment: Displays the environment type, either Staging, Development or Production
- Data Center: Displays the location of the Pressable data center where the child site is hosted at
- IP Address: Displays the IP Address of the Pressable data center where the child site is hosted at
- Visits This Month: Displays the number of visits for this child site for this month, as logged by Pressable
- Visits Last Two Years: Displays the number of visits for this child site for the last two years, as logged by Pressable
- Last Backup: Displays the date and time of the last performed Pressable backup
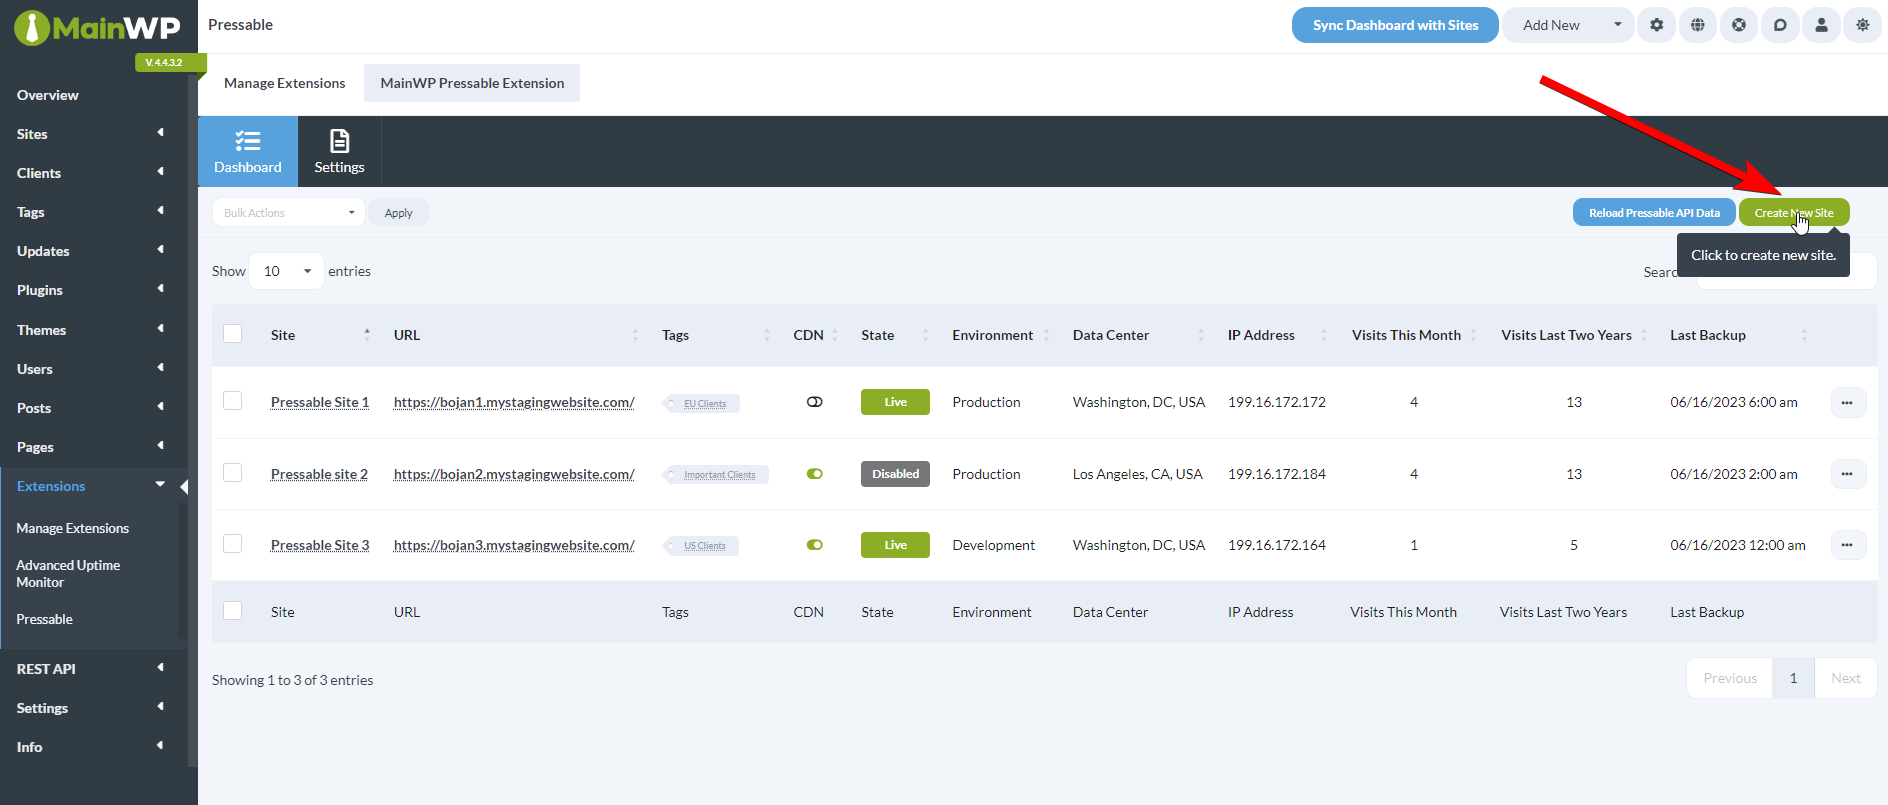
Create a new Pressable site
- Navigate to MainWP Dashboard > Extensions > Pressable page
- Click the Create New Site button
- Enter the information for the new site

- Enter the desired Site Name
NOTE: Periods, spaces, and other special characters are not permitted in site names. Dashes are fine, but the name cannot start or end with a dash. The name must be at least 3 characters in length. - Choose whether the site should be Staging or not
- From the Site Type dropdown, select either WordPress or WooCommerce
- From the PHP Version dropdown, select the available PHP version
- From the Datacenter dropdown, optionally select the location of the data center
- Enter the desired Site Name
- Click the Create Site button
Available Actions for Child Sites
Available actions you can perform on the child sites are located in the ellipsis menu, or if you want to perform them in bulk, you can find them in the Bulk Actions menu.
- Sync Data: Synchronizes the data collected by the MainWP Child plugin
- Overview: Opens the Child Site Overview on the MainWP Dashboard
- Edit: Opens the Child Site Edit page on the MainWP Dashboard
- Enable/Disable Site: Changes the State of the site in the Pressable hosting account to either Live or Disabled
- Delete Site: Deletes the site from the Pressable hosting account
- Convert to Staging / Staging to Live: Converts the site either from Staging to Live, or from Live to Staging
- Enable/Disable CDN: Either enables or disables the CDN feature on the Pressable hosting account
- Go to phpMyAdmin: Opens the phpMyAdmin page for that child site on the Pressable hosting account
- Manage Backups: Opens the Pressable Backups page for that Child Site. You can either initialize a Site Restore or download one of the existing backup files.