Controlling WordPress plugins at the same time is one of the key features of the MainWP Plugin. MainWP Plugin allows you to manage WordPress plugins across your Child Sites from one place, which results in a huge time-saving.
By using the MainWP Plugin, you can install a WordPress plugin on multiple websites in less than a minute. You can also activate, deactivate, delete, and update plugins on all your websites at the same time.
That is not all, MainWP Plugin will allow you to set automatic updates for WordPress plugins that you trust. Once you enable the feature and mark the “trusted” plugins, MainWP will do the rest.
Install Plugin(s)
Install From WP.org
- Login in to your MainWP Dashboard site
- Go to the MainWP > Plugins > Install Plugins page
- Under the Install from WordPress.org tab, a list of WordPress plugins will appear.
- Use the “Search plugins” field to find the plugin that you want to install
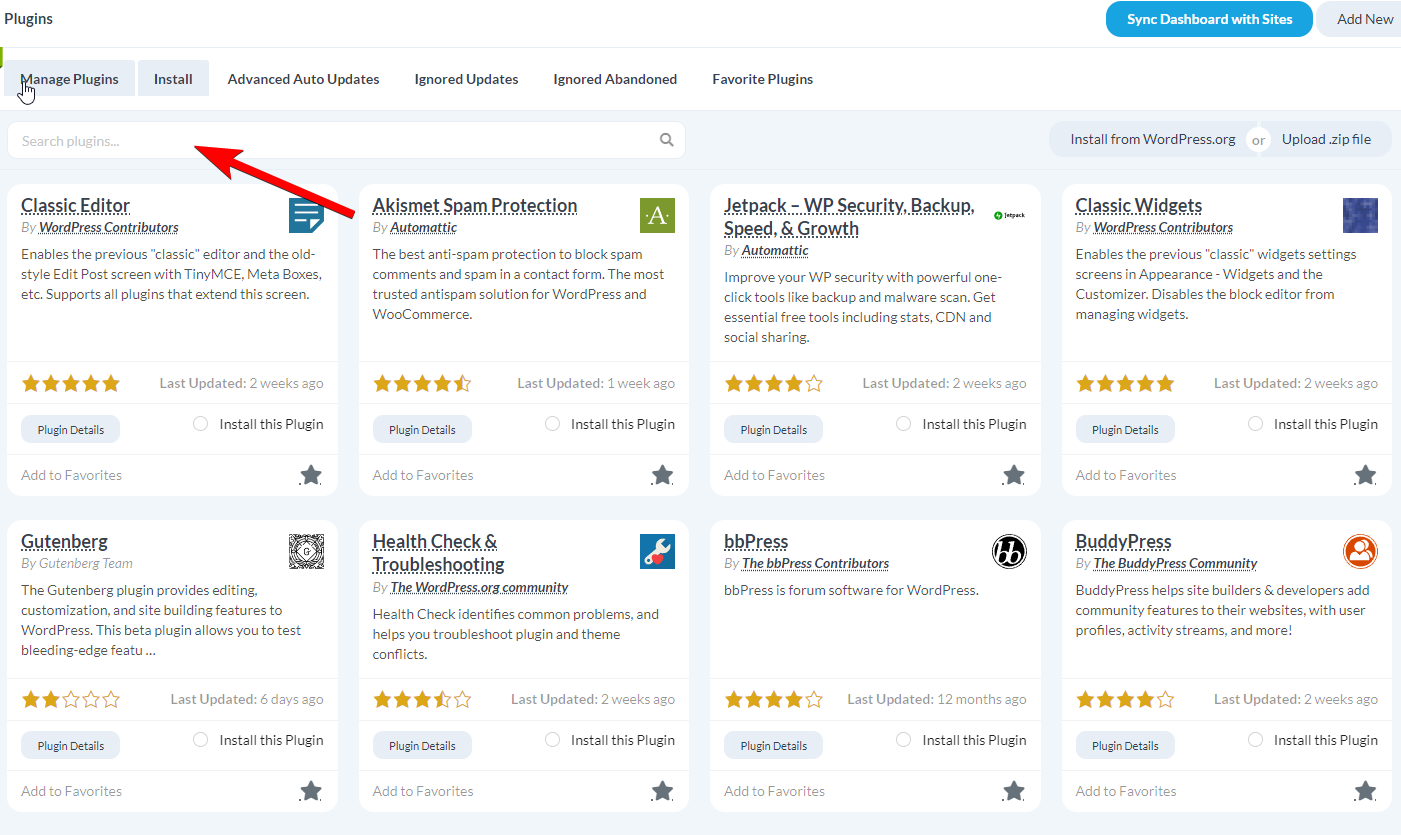
- Enter the Name of the Plugin and press Enter on your keyboard
- Search results will appear
- Locate the Plugin that you want to install
- Select it by checking the Install this Plugin radio button
- Next, in the Select Sites box, select all sites you want to install this plugin to
- Review the Installation Options

- Click the Complete Installation button

Installation Options
Activate after installation – if selected, the MainWP Plugin will automatically activate the installed plugin on your Child Sites.
Overwrite the existing version – if selected, the MainWP Plugin will overwrite the plugin on your Child Sites if the plugin is already installed.
Install by Upload
- Login in to your MainWP Dashboard site
- Go to the MainWP > Plugins > Install Plugins page
- Go to the Upload .zip file tab
- Click the Upload button
- Browse your computer and select the plugin .zip file
- After the upload process is done,
- In the Select Sites box, select all sites you want to install this plugin to
- Review the Installation Options

- Click the Complete Installation button
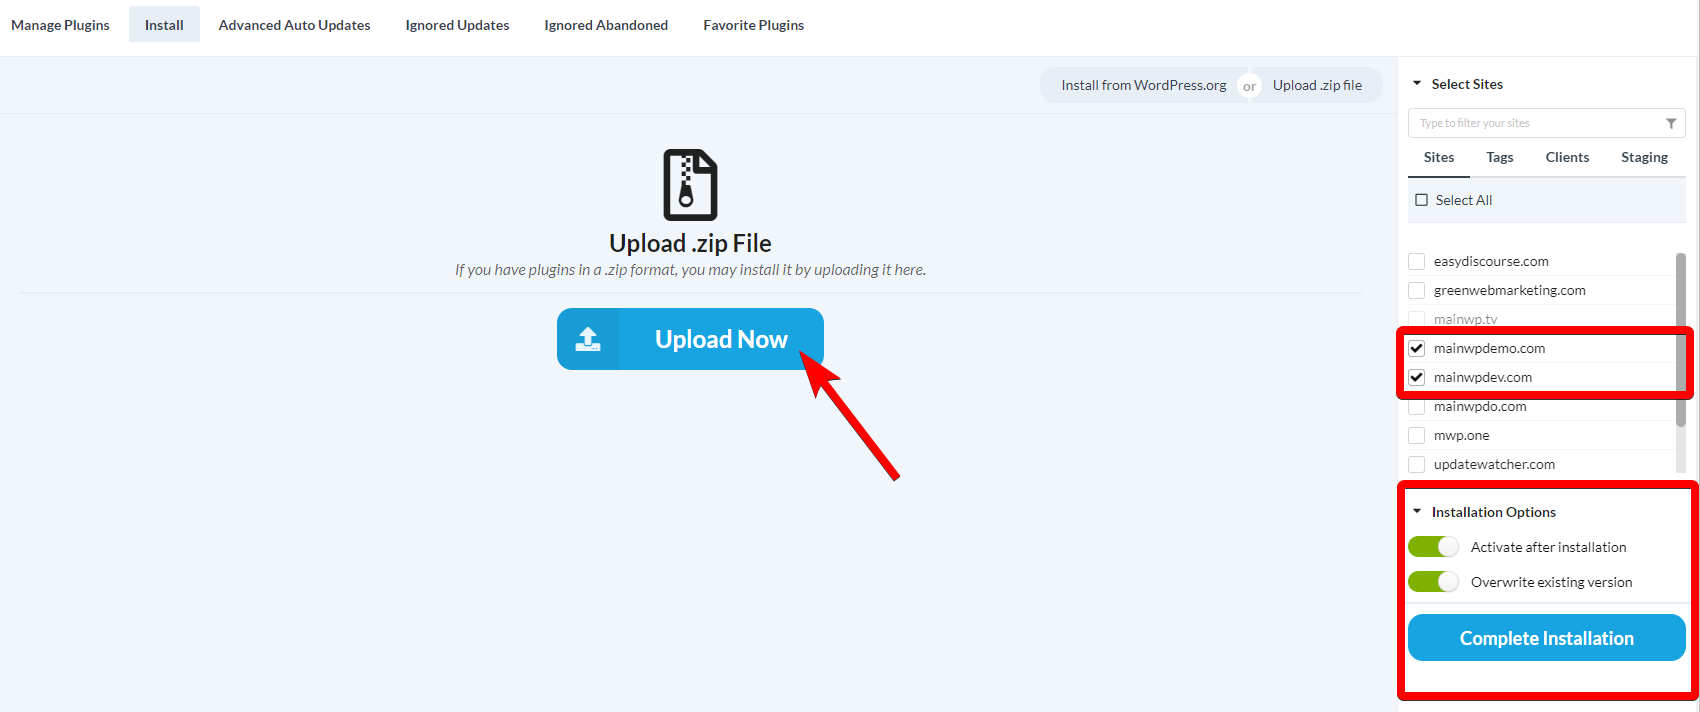
Installation Options
Activate after installation – if selected, the MainWP Plugin will automatically activate the installed plugin on your Child Sites.
Overwrite the existing version – if selected, the MainWP Plugin will overwrite the plugin on your Child Sites if the plugin is already installed.
Important Notes
When uploading a plugin in .zip format, you need to be sure that your server will allow the upload for the file size of the plugin. To see what is the Maximum File Size for your server, check the Server Information page on your MainWP Dashboard site.
Install Favorite Plugins
Activate Plugins
- Login in to your MainWP Dashboard site
- Go to the MainWP > Plugins > Manage Plugins page
- From the dropdown menu, select the desired table view Per Site or Per Item
- In the Search Plugins option boxIn the Status dropdown list, select the Inactive option
- Enter a name of the plugin that you want to activate (or leave blank to see all inactive plugins)
- In the Select Sites box, select all your sites where you want to activate this plugin
- Click the Show Plugins button
- Search results will appear in a table
- Select plugins/sites where you want to activate the plugin by selecting appropriate check-boxes

- In the Bulk Actions menu
- Select the Activate option
- Click the Confirm button

Deactivate Plugins
- Login in to your MainWP Dashboard site
- Go to the MainWP > Plugins > Manage Plugins page
- From the dropdown menu, select the desired table view Per Site or Per Item
- In the Search Plugins option box
- In the Status dropdown list, select the Active option
- Enter a name of the plugin that you want to deactivate (or leave blank to see all active plugins)
- In the Select Sites box, select all your sites where you want to deactivate this plugin.
- Click the Show Plugins button
- Search results will appear in a table
- Select plugins/sites where you want to deactivate the plugin by selecting appropriate check-boxes

- In the Bulk Actions menu
- Select the Deactivate option
- Click the Confirm button

Delete Plugins
Since deleting active plugins is not possible, deleting a plugin that is currently active requires deactivation before trying to delete it.
- Login in to your MainWP Dashboard site
- Go to the MainWP > Plugins > Manage Plugins page
- From the dropdown menu, select the desired table view Per Site or Per Item
- In the Search Plugins option box
- In the Status dropdown list, select Inactive option
- Enter a name of the plugin that you want to delete (or leave blank to see all inactive plugins)
- In the Select Sites box, select all your sites where you want to delete this plugin
- Click the Show Plugins button
- Search results will appear in a table
- Select plugins/sites where you want to delete the plugin by selecting appropriate check-boxes
- In the Bulk Actions menu

- Select the Delete option
- Click the Confirm button

Update Plugins
Before running updates, it is highly recommended to Synchronize your Child Sites so you can be sure that there is no cached data and all available updates are listed.
MainWP > Updates > Plugins Updates page is just one place where you can perform updates from. The same feature is provided in the Update Overview widget on the MainWP Global and Individual Overview page.
Update All Plugins on All Your Child Sites
- Login in to your MainWP Dashboard
- Go to the MainWP > Updates > Plugins page
- Click the Update All Plugins (Update All Sites) button

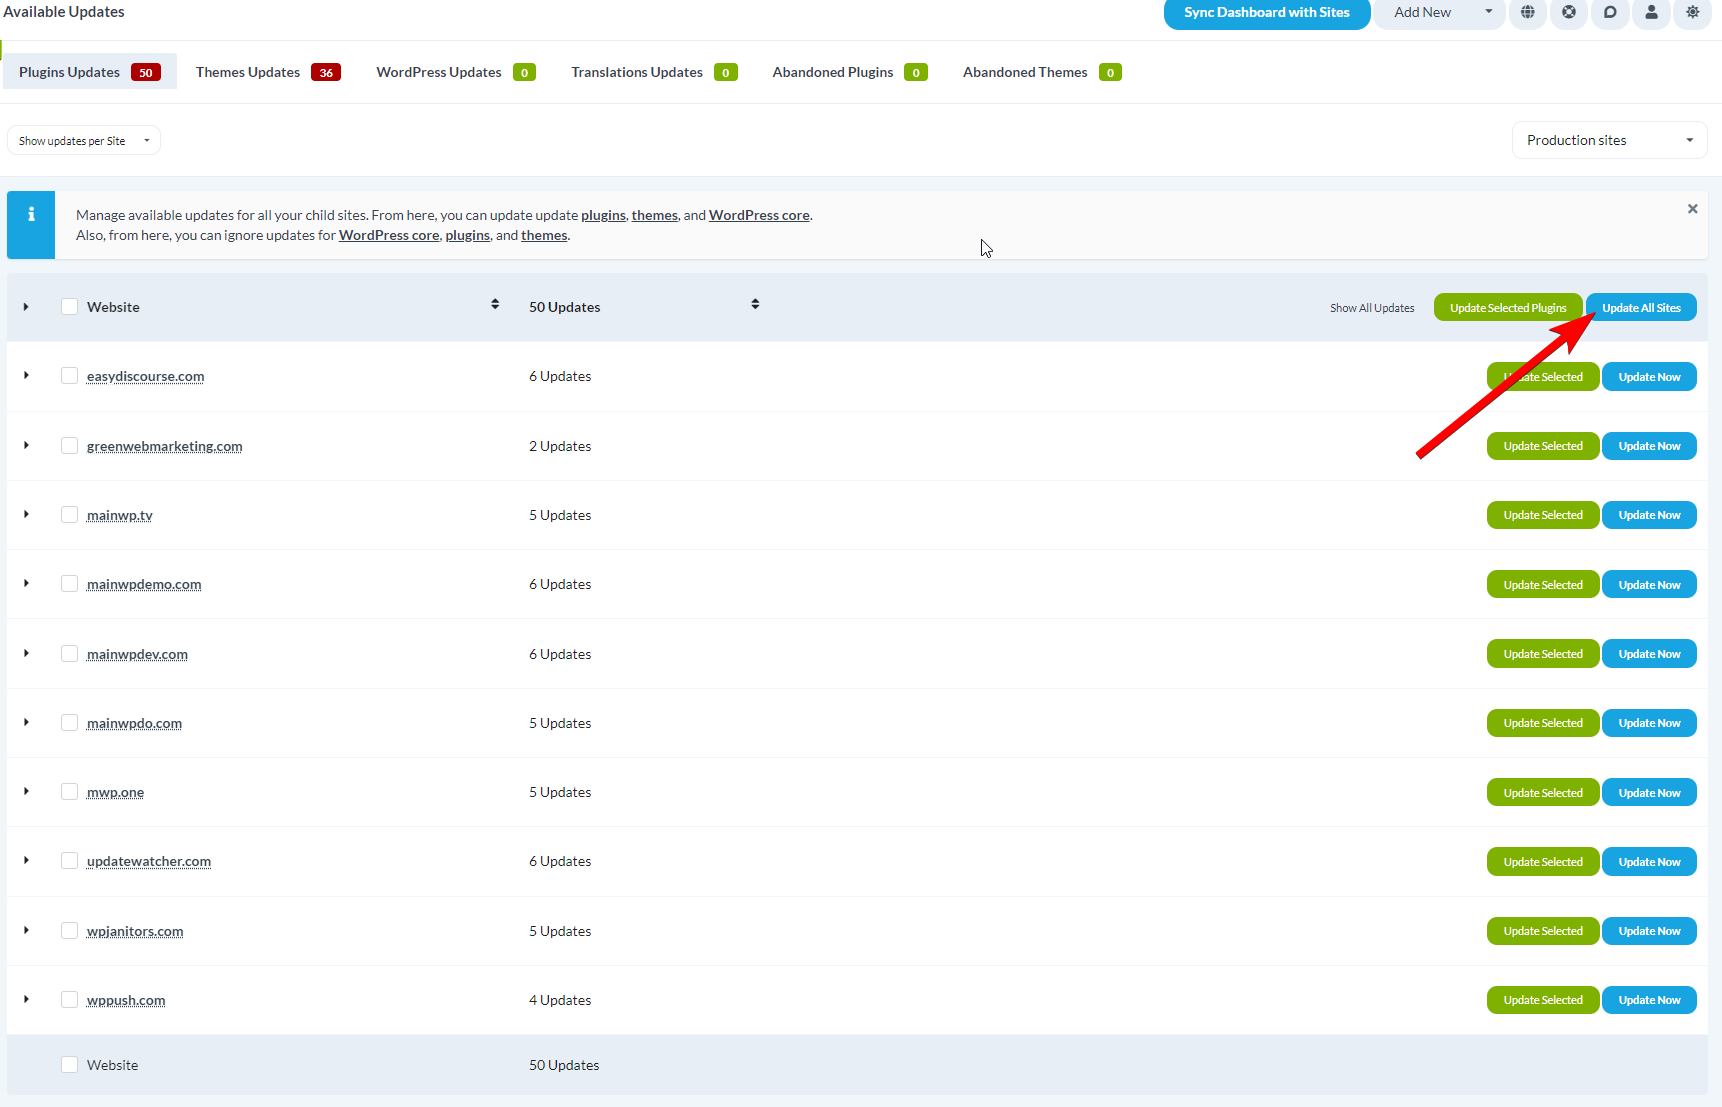
A verification popup will appear and ask if you are sure you want to update everything. If you are sure, confirm, and the MainWP plugin will handle all updates.
Update a Single Plugin on All Your Child Sites
- Login in to your MainWP Dashboard
- Go to the MainWP > Updates > Plugins Updates page
- Locate the Show updates per option and select “Item”
- Locate the plugin that you want to update on all your child sites

- Click the Update All button

A verification popup will appear and ask if you are sure you want to update everything. If you are sure, confirm, and the MainWP plugin will handle all updates.
Update All Plugins on a Single Child Site
- Login in to your MainWP Dashboard
- Go to the MainWP > Updates > Plugins Updates page
- Locate the Show updates per option and select “Site”
- Locate the Child Site that you want to update

- Click the Update All button that is placed in the corresponding row
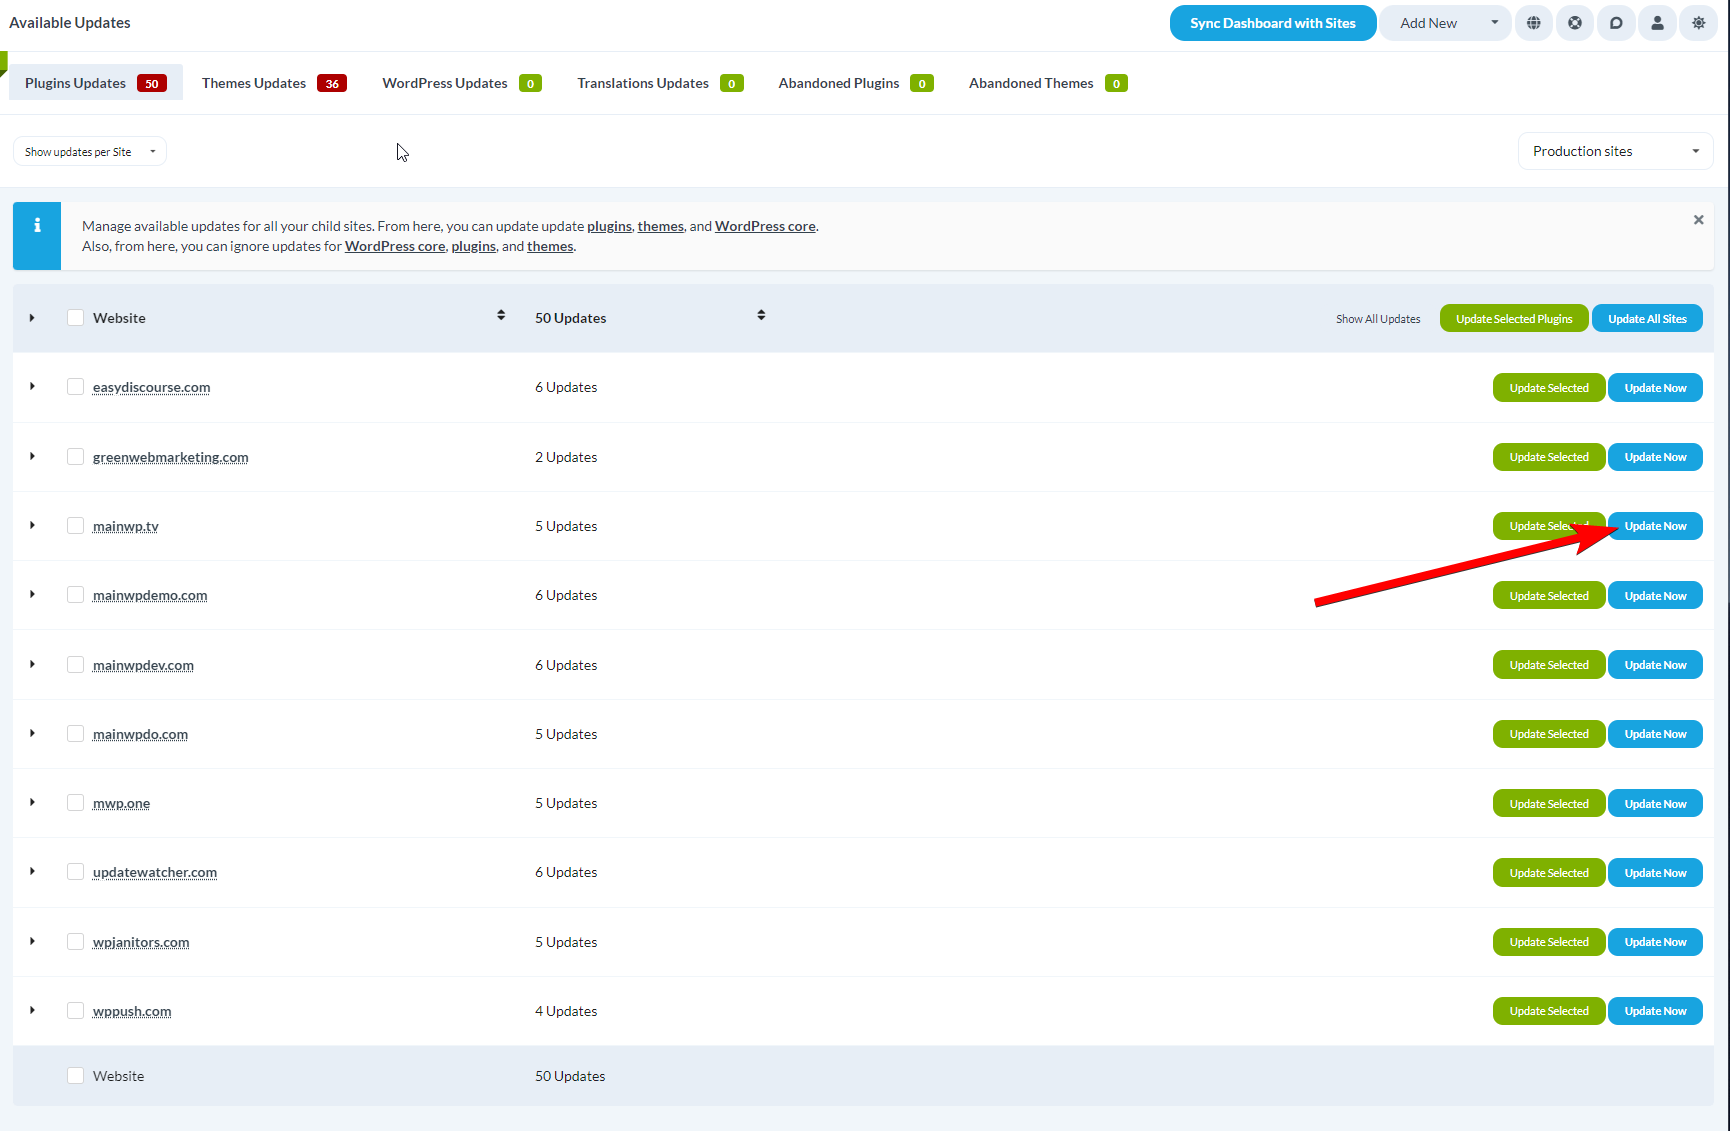
A verification popup will appear and ask if you are sure you want to update everything. If you are sure, confirm, and the MainWP plugin will handle all updates.
Update a Single Plugin on a Single Child Site
- Login in to your MainWP Dashboard
- Go to the MainWP > Updates > Plugins Updates page
- Locate the View updates per option and select “Site.”
- Locate the Child Site where you need to update a Plugin
- Expand the row
- Locate the Plugin that you want to update

- Click the Update Now button

A verification popup will appear and ask if you are sure you want to update everything. If you are sure, confirm, and the MainWP Plugin will handle all updates.
Plugins Auto Updates
MainWP Auto Updates feature is designed to provide you full control over automatic updates of Plugins on your Child sites. The process of setting auto-updates requires two steps:
- Enabling the Auto Updates Feature
- Marking plugins as “Trusted.”
Enable Auto Updates
- Login in to your MainWP Dashboard
- Go to the MainWP > Settings page
- Locate the Updates Settings section
- Set the Plugin automatic updates option to Install Updates
- Click the Save Settings button at the bottom of the page
Mark a plugin as “Trusted.”
- Login in to your MainWP Dashboard
- Go to the MainWP > Plugins > Advanced Auto Updates page
- Set the Status, Trust Status, and the Keyword search filters to find the wanted Plugin(s)
- Click the Show Plugins button
- Once the list of Plugins appear

- Locate the Plugin(s) that you want to mark as trusted
- Select it by checking the checkbox in front of the Plugin(s) name
- Select the Trust action in the Bulk Actions menu
- Click the Apply button

Important Notes
Setting a Plugin as Trusted means that you trust this Plugin and are choosing to allow MainWP to manage it for you.
From the moment your MainWP Dashboard detects the available update, it can take up to 24 hours before the trusted plugins get updated.
MainWP Auto Updates feature is a WP Cron driven feature, and it can work only if your WP Cron is triggered regularly.