The MainWP Boilerplate Extension gives you the ability to easily create repetitive pages or posts on your child sites.
Using the available placeholders (Tokens), these pages can be customized for each site without needing to be rewritten. The Boilerplate extension is the perfect solution for commonly repeated pages such as:
- Privacy Policy
- About Us
- Terms of Use
- Support Policy
or any other page with standard text that needs to be distributed across multiple websites.
How does the Boilerplate Extension Work?
After installing the extension, you can create custom placeholders (Tokens) that you will need in your commonly used pages and posts. For each of your child sites, add values for the tokens. When you are done with the setup, you can create one page with these placeholders and post it to all wanted sites. On each child site, the placeholders will be replaced with the custom values for the site.
All your Boilerplate Pages and Posts will be saved and fully editable. With just a few clicks, you will be able to tweak a page on all your sites at once.
Boilerplate Tokens
Boilerplate pages use tokens to be customized for each site without needing to be rewritten. Basically, in the source post, instead of using actual data, you can place tokens. After publishing, tokens will be replaced by actual values on each child site.
The MainWP Boilerplate extension comes with a set of default tokens and the ability to create custom tokens.
For both default and custom tokens, it is required to set values for each child site individually, which will replace the token on child sites after publishing a boilerplate post or page.
Default Boilerplate Tokens
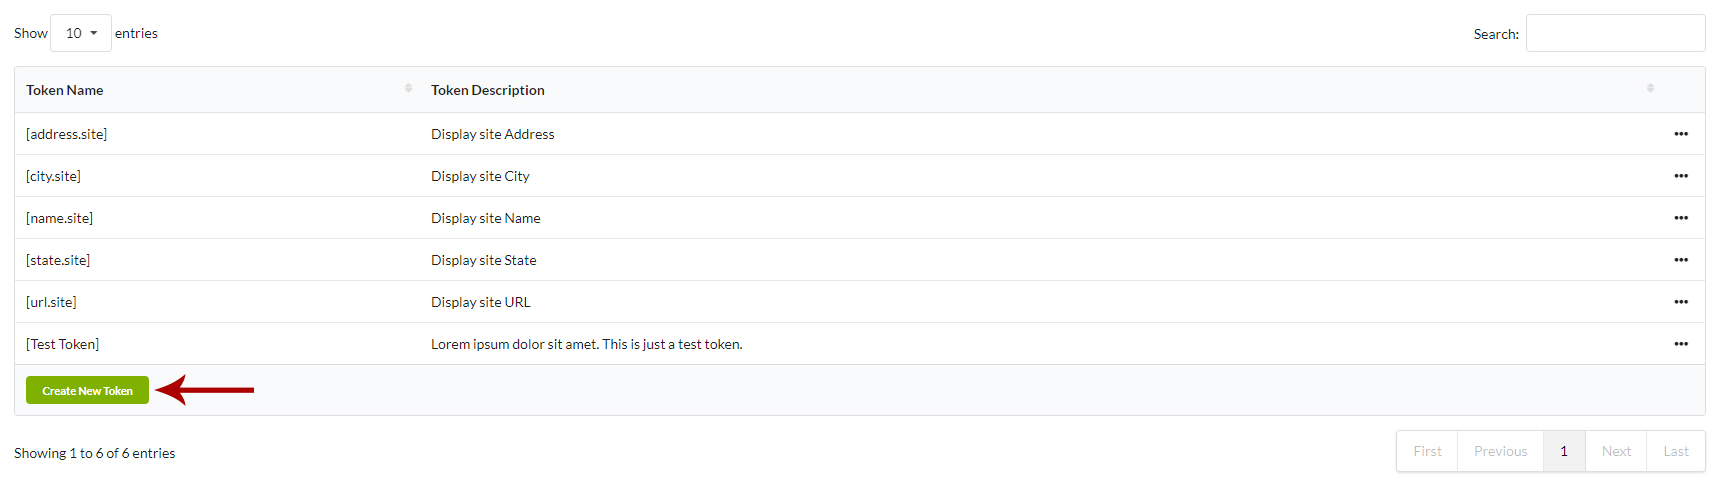
After installing the MainWP Boilerplate Extension, on the MainWP > Extensions > Boilerplate > Custom Tokens page, you will be able to see the section with available tokens.

Along with a token, on the right-hand side, you can see the token description so you can get an idea of what to use it for.
Set Values for Default Tokens
- Login in to your MainWP Dashboard
- Go to the MainWP > Sites > Manage page
- Locate one site and click the Edit action
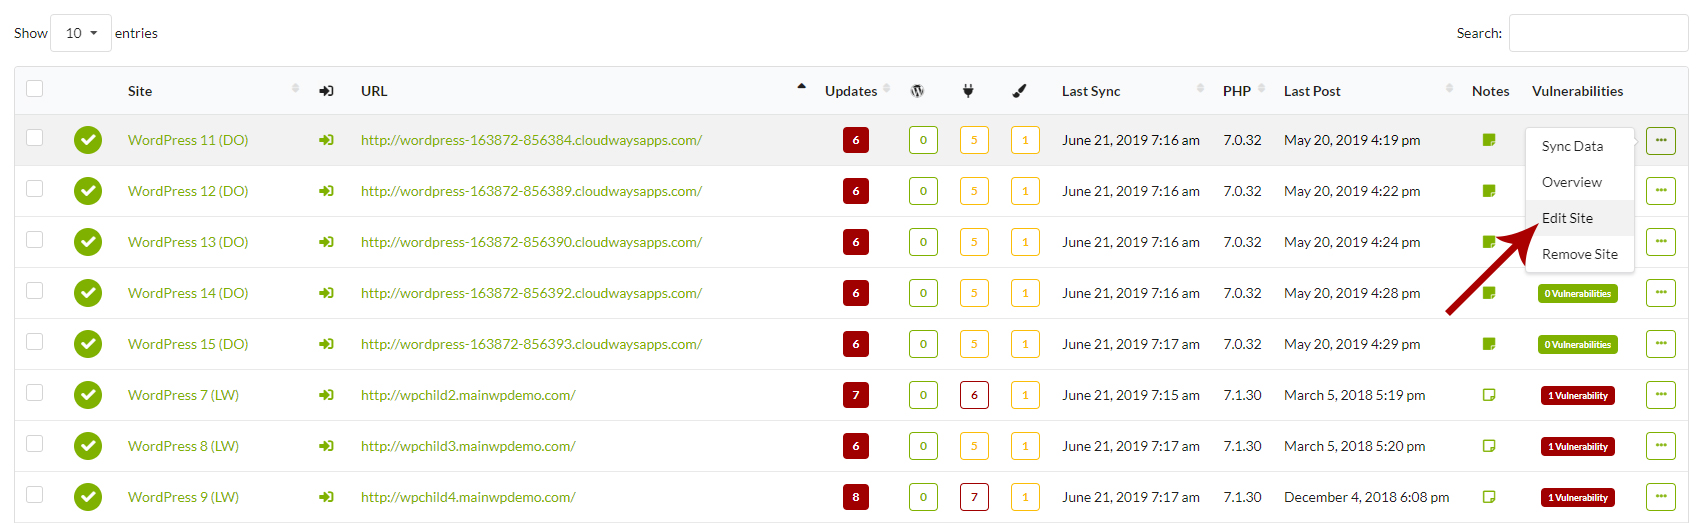
- Locate the Boilerplate Settings section
- Enter values for tokens that you intend to use
- Click the Update Site button
- Repeat steps 3 – 6 for the rest of your child sites
Custom Boilerplate Tokens
Along with the set of default tokens, the MainWP Boilerplate Extension allows you to create your custom tokens.
Create Custom Tokens
- Login in to your MainWP Dashboard
- Go to the MainWP > Extensions > Boilerplate > Custom Tokens page
- Click the Create Custom Token button
- Modal will show
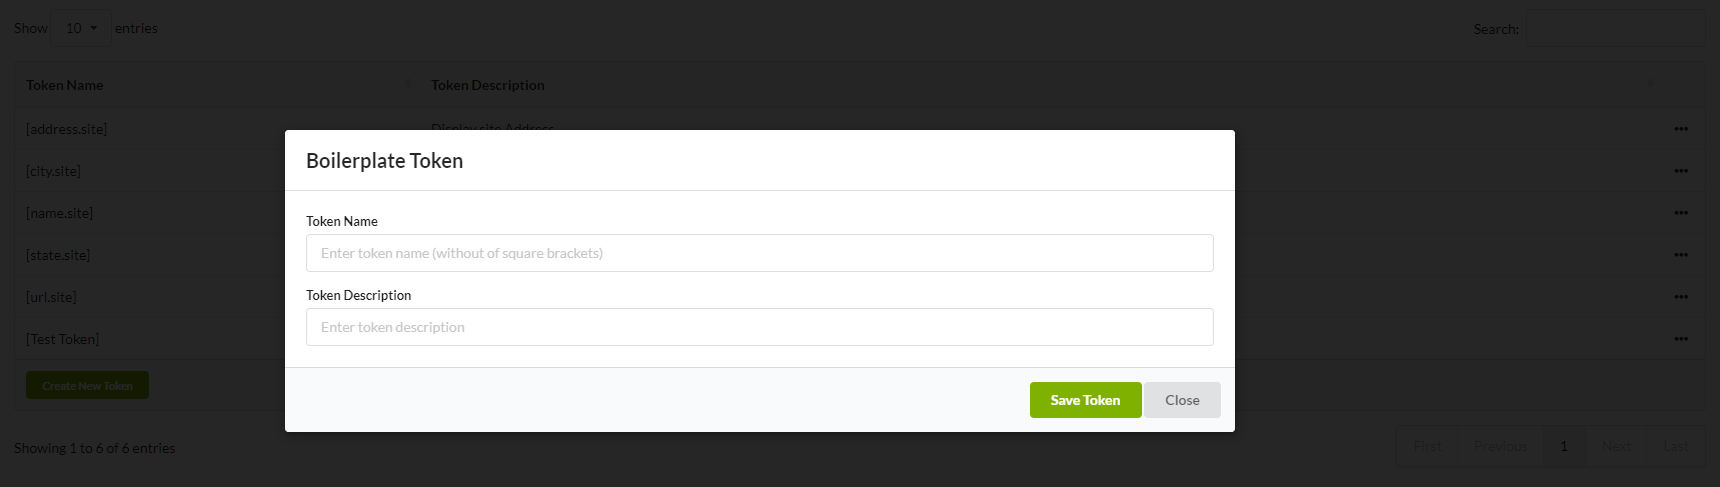
- Add Token Name
- Add Token Description
- Click the Save button
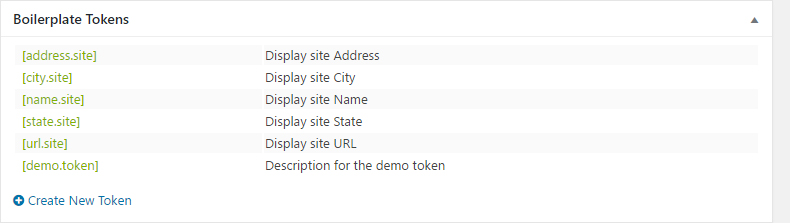
After saving the new token, the token will appear in the Tokens table. From here, you can Edit or Delete it.
Also, from this moment, the token will be added to the Boilerplate Settings option box on the child site edit page, where you can set values for the token.
Avoid creating tokens that our reserved for our Clients functionality and Pro Reports extension: [client.city] [client.contact.address.1] [client.contact.address.2] [client.contact.name] [client.email] [client.name] [client.phone] [client.site.name] [client.site.url] [client.state] [client.zip] [client.facebook] [client.twitter] [client.instagram] [client.linkedin] [client.country] [client.note] [client.created] [client.contact.name] [contact.role] [contact.email] [contact.phone] [contact.facebook] [contact.twitter] [contact.instagram] [contact.linkedin]
Set Values for Custom Tokens
- Login in to your MainWP Dashboard
- Go to the MainWP > Sites > Manage page
- Locate one site and click the Edit action
- Locate the Boilerplate Settings option box
- Enter values for tokens that you intend to use
- Click the Update Site button
- Repeat steps 3 – 6 for the rest of your child sites
Boilerplate Posts
After publishing a boilerplate post on your child sites, the post looks normal, just like any other WordPress post. After it’s created, the post will be visible normally in the WP > Posts > All Posts page on child sites.
However, on the MainWP Dashboard side, the list of created Boilerplate posts is available in the MainWP > Extensions > Boilerplate page, in the Boilerplate Posts tab.

From here, you can Edit and Delete Boilerplate posts.
Create Boilerplate Post
- Login in to your MainWP Dashboard
- Go to the MainWP > Posts > Add Boilerplate page
- Compose the post as any other WordPress post, but in the post body, you can use tokens where needed.
 Tokens are allowed in Post Title and in the Post Boddy.
 - Select your Child Sites where you want to publish this post
- Click the Publish button
How to insert Tokens
 Tokens can be inserted manually by typing the token where it’s needed or by clicking on a token in the Tokens meta box. After clicking on a token, the token will be inserted in the post automatically.
Edit Existing Boilerplate Post
- Login in to your MainWP Dashboard
- Go to the MainWP > Extensions > Boilerplate > Boilerplate Posts page
- Click the Edit action in the actions menu
- Edit the post content or meta values
- Click the Update button
After clicking the Update button, updates will be applied to all child sites.
Add Existing Boilerplate Post to a New Site
If you have a Boilerplate post that you want to add to a newly connected child site, you can do that by following these steps:
- Login in to your MainWP Dashboard
- Go to the MainWP > Extensions > Boilerplate > Boilerplate Posts page
- Click the Edit action in the actions menu
- Locate the Select Sites section
- Select the new Child Site
- Click the Update button
After clicking the Update button, the boilerplate post will be added to new sites.
Remove a Boilerplate Post from a Child Site
If you have a Boilerplate post that you want to remove from one or multiple child sites, you can do that by following these steps:
- Login in to your MainWP Dashboard
- Go to the MainWP > Extensions > Boilerplate > Boilerplate Posts page
- Click the Edit action in the actions menu
- Locate the Select Sites section
- Unselect wanted sites
- Click the Update button
After clicking the Update button, the boilerplate post will be removed from the unselected child sites.
Delete a Boilerplate Post
- Login in to your MainWP Dashboard
- Go to the MainWP > Extensions > Boilerplate > Boilerplate Posts page
- Click the Delete action in the actions menu
Important Notes
After clicking the Delete action, the boilerplate post will be removed from the extension database, but the actual posts will stay on your child sites.
Boilerplate Pages
After publishing a boilerplate page on your child sites, the page looks normal, just like any other WordPress page. After it’s created, the page will be visible normally in the WP > Pages > All Pages page on child sites.
However, on the MainWP Dashboard side, the list of created Boilerplate pages is available in the MainWP > Extensions > Boilerplate page, in the Boilerplate Pages tab.

From here, you can Edit and Delete Boilerplate pages.
Create a Boilerplate Page
- Login in to your MainWP Dashboard
- Go to the MainWP > Pages > Add Boilerplate page
- Compose the page as any other WordPress page, but in the page body, you can use tokens where needed.
Tokens are allowed in Page Title and in the Page Boddy.
- Select your Child Sites where you want to publish this page
- Click the Publish button
How to insert Tokens
Tokens can be inserted manually by typing the token where it’s needed or by clicking on a token in the Tokens meta box. After clicking on a token, the token will be inserted on the page automatically.
Edit Existing Boilerplate Page
- Login in to your MainWP Dashboard
- Go to the MainWP > Extensions > Boilerplate > Boilerplate Pages page
- Click the Edit action in the actions menu
- Edit the page content or meta values
- Click the Update button
After clicking the Update button, updates will be applied to all child sites.
Add Existing Boilerplate Page to a New Site
If you have a Boilerplate page that you want to add to a newly connected child site, you can do that by following these steps:
- Login in to your MainWP Dashboard
- Go to the MainWP > Extensions > Boilerplate > Boilerplate Pages page
- Click the Edit action in the actions menu
- Locate the Select Sites section
- Select the new Child Site
- Click the Update button
After clicking the Update button, the boilerplate post will be added to new sites.
Remove a Boilerplate Page from a Child Site
If you have a Boilerplate page that you want to remove from one or multiple child sites, you can do that by following these steps:
- Login in to your MainWP Dashboard
- Go to the MainWP > Extensions > Boilerplate > Boilerplate Pages page
- Click the Edit action in the actions menu
- Locate the Select Sites section
- Unselect wanted sites
- Click the Update button
After clicking the Update button, the boilerplate page will be removed from the unselected child sites.
Delete a Boilerplate Page
- Login in to your MainWP Dashboard
- Go to the MainWP > Extensions > Boilerplate > Boilerplate Pages page
- Click the Delete action in the actions menu
Important Notes
After clicking the Delete action, the boilerplate page will be removed from the extension database, but the actual pages will stay on your child sites.